Install
GUI Wallet
To use Grin with a graphical user interface, see wallets.
The Quickstart series will guide you in your first steps of installing a Grin node, creating a wallet, and making a transaction.
We begin by downloading the precompiled binaries.
grin- grin node.grin-wallet- command-line wallet.
First, choose your operating system:
Linux
Go to grin.mw/download and download the tgz files of grin and grin-wallet by clicking on their name titles.
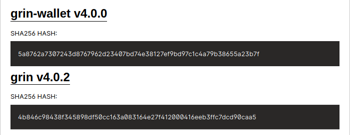
To verify the release, calculate the sha256sum of the binaries and compare the result against their respective SHA256 HASH on the website (or in releases).
sha256sum grin-wallet-$VERSION-linux-amd64.tar.gz
sha256sum grin-$VERSION-linux-amd64.tar.gz
Replace $VESION with the appropriate version for each binary, e.g. v4.0.2
Next, in the terminal, navigate to the directory where the files were downloaded and type:
sudo tar -C /usr/local/bin -xzf grin-$VERSION-linux-amd64.tar.gz --strip-components=1
sudo tar -C /usr/local/bin -xzf grin-wallet-$VERSION-linux-amd64.tar.gz --strip-components=1
libncursesw error ↴
If you have the following error when you start grin:
grin: error while loading shared libraries: libncursesw.so.5: cannot open shared object file: No such file or directory
Then install libncursesw5:
sudo apt install libncursesw5
And you're done!
Snap Store
You can also install everything as Snap package, however, note that you can't verify its content.
To install, type:
snap install grin
When installed with Snap, grin-wallet is accessible using the grin.wallet command instead of grin-wallet.
macOS
The easiest way to install grin and grin-wallet on macOS is with homebrew.
If you do not have homebrew installed, open the "Terminal.app" and paste the following line:
/bin/bash -c "$(curl -fsSL https://raw.githubusercontent.com/Homebrew/install/master/install.sh)"
This will install homebrew on your computer.
Once it's finished, you can simply install the binaries:
brew install grin grin-wallet
Windows
Go to grin.mw/download and download the zip files of grin and grin-wallet by clicking on their name titles.
We recommend that you create a directory called Grin in C:\Users\%USER%\AppData\Local. The parent directory is where most user windows apps are installed, but if you want to put them somewhere else, that'll work too.
In this directory, extract both binaries grin.exe and grin-wallet.exe. Then, add them to your path by typing in the terminal:
set PATH=%PATH%;C:\Users\%USER%\AppData\Local
Remember to replace %USER%
That's it, you're done!